
Laptop speakers not working properly can be a frustrating experience, but many common issues can be resolved with a few troubleshooting steps. This comprehensive guide will walk you through the process of diagnosing and repairing laptop speaker problems, whether they are caused by software or hardware issues. Our goal is to provide clear, actionable steps that allow you to resolve the issue and restore your laptop’s audio functionality.
Understanding Laptop Speaker Issues
Before jumping into repairs, it’s essential to understand what might be causing the issue. Laptop speaker problems generally fall into two categories: software-related and hardware-related.
Software-Related Issues
- Outdated or Corrupted Audio Drivers
Drivers are critical for enabling the communication between your laptop’s audio hardware and operating system. If the audio drivers are outdated, corrupt, or incompatible, you may experience issues with your laptop speakers, such as no sound or distorted audio. - Incorrect Audio Settings
Often, sound problems arise from incorrect audio settings, such as the volume being turned down or audio being routed to the wrong output device. These issues can be quickly resolved by adjusting your system settings.
Hardware-Related Issues
- Loose or Disconnected Internal Connections
Internal connections may become loose over time, especially if the laptop has been dropped or bumped. The cables that connect the speakers to the motherboard may also become disconnected or damaged. - Damaged Speakers
Physical damage to the speakers, such as blown drivers or tears in the diaphragm, can result in no sound or distorted audio. In some cases, this might require replacing the speakers.
Step-by-Step Guide to Repairing Laptop Speakers
Step 1: Diagnose the Issue
Check Volume and Mute Settings
Before diving into complex troubleshooting, start with the basics. Check that the volume is turned up and not muted. Verify both the system volume and any physical volume controls on your laptop.
Test with Headphones
Plug in a pair of headphones to determine if the issue is with the speakers or the entire audio system. If the sound works through the headphones but not the speakers, it’s likely that the problem is with the speakers themselves.
Inspect Audio Settings
Right-click the speaker icon in the system tray (bottom-right corner of the screen) and select ‘Playback devices.’ Ensure that your laptop’s internal speakers are selected as the default playback device. If they are not, select them as the default and check if the sound works.
Step 2: Update or Reinstall Audio Drivers
Update Audio Drivers
Outdated or corrupted audio drivers can often cause sound problems. To check for updates, follow these steps:
- Open Device Manager (press Windows + X and select Device Manager).
- Expand the Sound, video, and game controllers section.
- Right-click your audio device and select Update driver.
- Choose Search automatically for updated driver software and follow the prompts to update your drivers.
Reinstall Audio Drivers
If updating the drivers doesn’t resolve the issue, try reinstalling them:
- In Device Manager, right-click your audio device and select Uninstall device.
- Restart your laptop, and Windows should automatically reinstall the drivers upon reboot.
Step 3: Run the Windows Audio Troubleshooter
If the above steps don’t work, Windows has a built-in troubleshooter that can identify and fix common audio issues.
- Open Settings by pressing Windows + I.
- Go to Update & Security > Troubleshoot.
- Under Find and fix other problems, select Playing Audio.
- Click Run the troubleshooter and follow the on-screen instructions. The troubleshooter will attempt to identify any audio-related issues and offer solutions.
Step 4: Inspect Hardware Connections
If the software fixes don’t resolve the issue, it’s time to check the hardware components. Before opening the laptop, ensure it is powered off and unplugged from any power source.
Power Off and Unplug the Laptop
Turn off your laptop and disconnect any cables, including the charger and external devices.
Open the Laptop Case
Consult your laptop’s user manual or online guide for instructions on how to safely open the case. Depending on your model, this could require removing screws or using special tools.
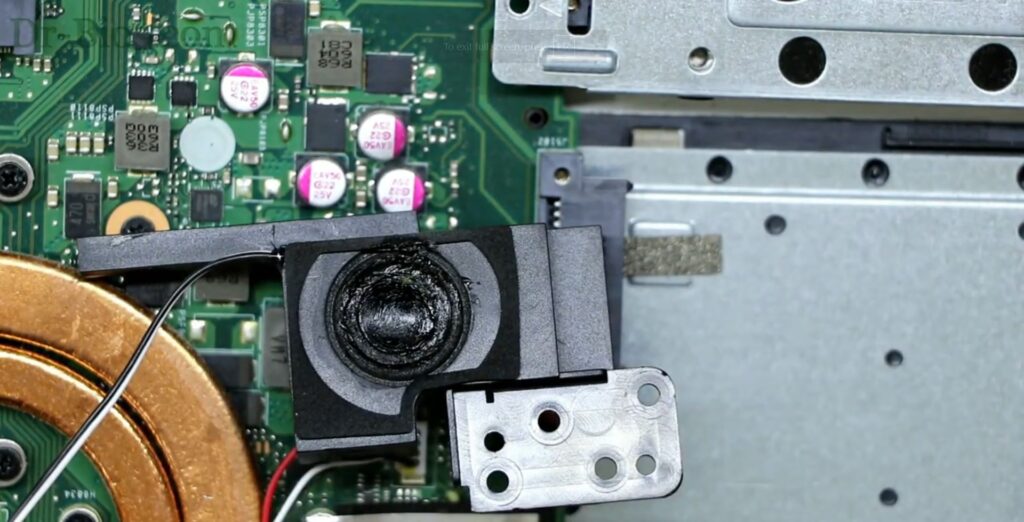
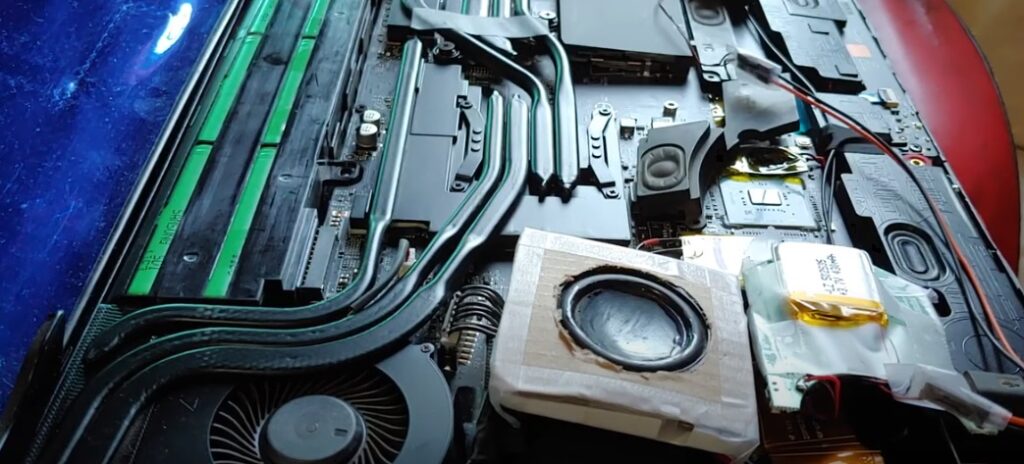
Check Speaker Connections
Once you have access to the internals, locate the speakers and check the connections. Make sure the cables are securely attached to both the speakers and the motherboard. If any connections are loose or disconnected, carefully reconnect them. You may also want to inspect the cables for any visible signs of wear or damage.
Step 5: Replace Damaged Speakers (if necessary)
If the speakers are physically damaged, such as having blown drivers or tears in the diaphragm, they may need to be replaced. Replacing laptop speakers can be challenging, and it’s often best to consult a professional technician if you’re unfamiliar with laptop repairs.
However, if you are confident in your DIY skills, you can purchase replacement speakers for your specific laptop model and follow detailed guides available online for installation.
Conclusion
Laptop speaker issues can be frustrating, but with a methodical approach, you can troubleshoot and resolve most problems. Start by diagnosing whether the issue is software or hardware-related. Then, follow the appropriate steps to fix outdated drivers, correct audio settings, and inspect hardware connections. In cases of severe damage, you may need to replace the speakers.
By following this guide, you’ll be able to restore your laptop’s audio functionality and get back to enjoying sound without unnecessary delays.